DESIGN
The Design Process
Every community has a unique identity and a vision to match. The design is an expression of that community. At the Rashi School, the goal from the start was to create a mosaic for the Shelter of Peace inside the school. The design process started with a series of conversations and brainstorming meetings, with teachers, staff, parents and students. The most important ideas were woven together into this final design sketch.
Every community has a unique identity and a vision to match. The design is an expression of that community. At the Rashi School, the goal from the start was to create a mosaic for the Shelter of Peace inside the school. The design process started with a series of conversations and brainstorming meetings, with teachers, staff, parents and students. The most important ideas were woven together into this final design sketch.
Studying the Design
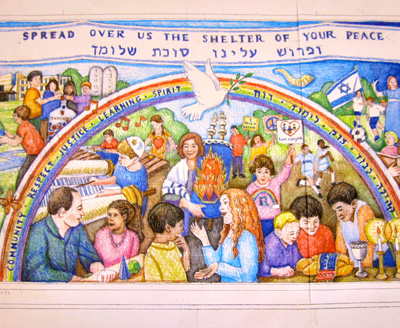
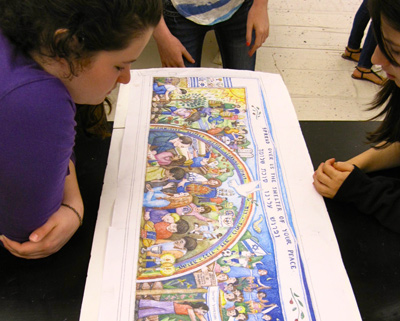
The design sketch is a working model for the mosaic. It is drawn to scale, rendered in full color, and detailed to show all aspects of the design. In the classroom, students study the drawing. They also use the drawings as the basis for making decisions about how to do the mosaic.
The design sketch is a working model for the mosaic. It is drawn to scale, rendered in full color, and detailed to show all aspects of the design. In the classroom, students study the drawing. They also use the drawings as the basis for making decisions about how to do the mosaic.
Students Pose for a Scene
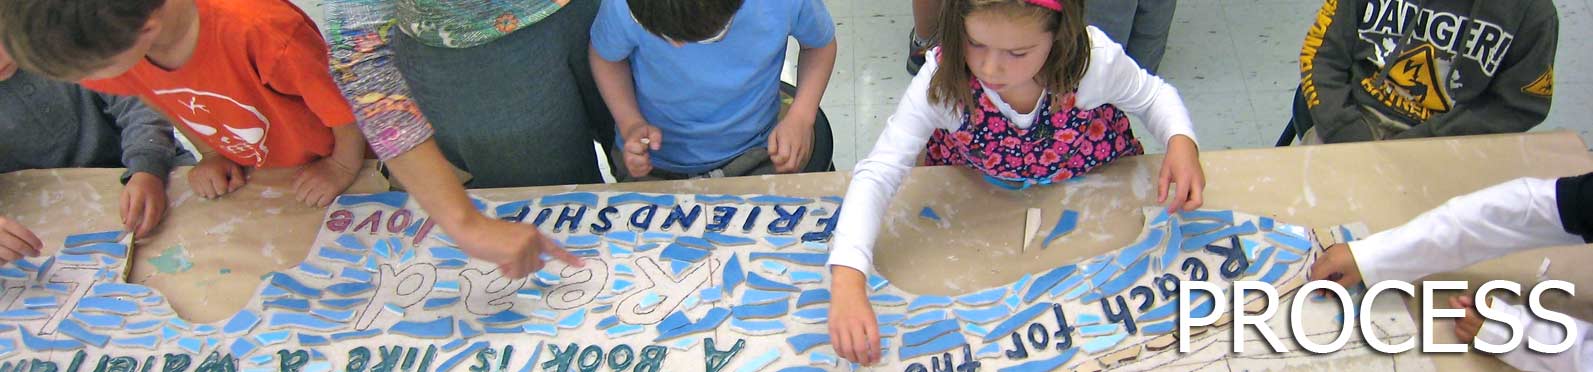
The Rashi School mosaic has many figures in realistic poses. These poses were modeled by the students. Though the details often change in the mosaic making process, the students learn about the techniques of how an artist designs and models people in art. They also have the fun of posing!
The Rashi School mosaic has many figures in realistic poses. These poses were modeled by the students. Though the details often change in the mosaic making process, the students learn about the techniques of how an artist designs and models people in art. They also have the fun of posing!
The Design Becomes a Mosaic
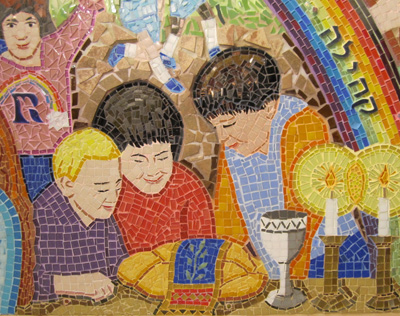
The Rashi School celebrates the end of the week with a Shabbat service. The pose above was used as the basis for this scene, with the addition of a loaf of bread, a goblet of wine and candles. The students developed each area in glass mosaic to express the character of each person and object. The candle flames use golden glass mosaic to capture the warmth radiating from the candles.
The Rashi School celebrates the end of the week with a Shabbat service. The pose above was used as the basis for this scene, with the addition of a loaf of bread, a goblet of wine and candles. The students developed each area in glass mosaic to express the character of each person and object. The candle flames use golden glass mosaic to capture the warmth radiating from the candles.
Creativity and Imagination
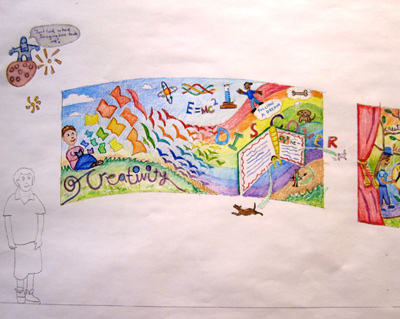
This is the left hand side of the Pike School mosaic design sketch. Every student in the school created a drawing on the theme of Creativity and Imagination. Chris and Vanessa, the two art teachers, selected drawings that best seemed to express this concept. I composed these drawings, tracing over the students work, into this larger drawing, then rendered it with colored pencils. This is the working drawing for the mosaic.
This is the left hand side of the Pike School mosaic design sketch. Every student in the school created a drawing on the theme of Creativity and Imagination. Chris and Vanessa, the two art teachers, selected drawings that best seemed to express this concept. I composed these drawings, tracing over the students work, into this larger drawing, then rendered it with colored pencils. This is the working drawing for the mosaic.
How Was This Design Created?
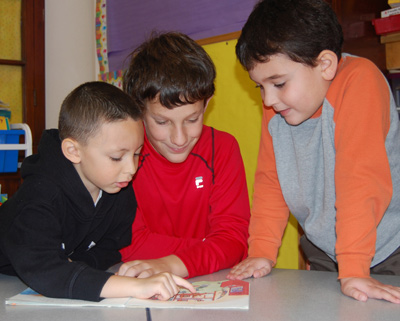
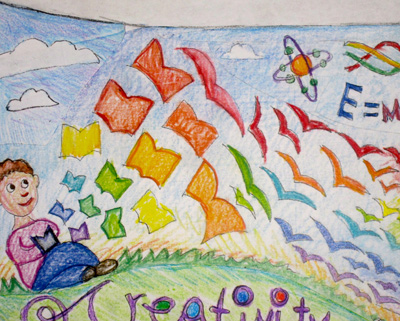
The students started by creating individual drawings on paper, which they colored. Some of these were quick sketches, done in one class. Others were more elaborate drawings with a lot of detail, drawn over a longer period of time. This drawing, by a 7th grader, is a terrific drawing! It shows a boy sitting and reading, with flying books transforming into colored birds which become a rainbow. This was the starting point for the whole design.
The students started by creating individual drawings on paper, which they colored. Some of these were quick sketches, done in one class. Others were more elaborate drawings with a lot of detail, drawn over a longer period of time. This drawing, by a 7th grader, is a terrific drawing! It shows a boy sitting and reading, with flying books transforming into colored birds which become a rainbow. This was the starting point for the whole design.
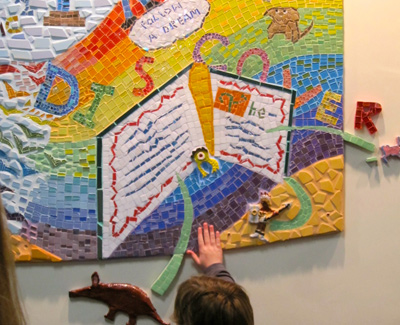
From Drawing to Mosaic
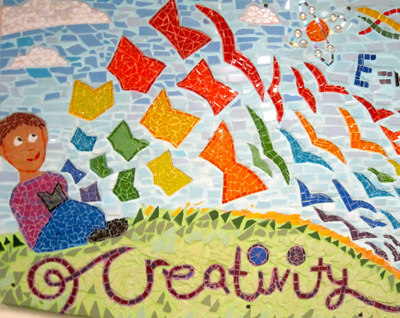
Once the design is done, it is the map for the whole project. First, we enlarge the design onto panels with a projector, and trace the major outlines in black marker. Then we build the mosaic piece by piece, closely following the forms and colors. The tiles flow with the design. For example, the blue tiles of the sky flow across the panel behind the books. These kind of tile rhythms (called adamento) are the music of the mosaic.
Once the design is done, it is the map for the whole project. First, we enlarge the design onto panels with a projector, and trace the major outlines in black marker. Then we build the mosaic piece by piece, closely following the forms and colors. The tiles flow with the design. For example, the blue tiles of the sky flow across the panel behind the books. These kind of tile rhythms (called adamento) are the music of the mosaic.
Off the Wall
This is a fun detail. The 4th grade artists drawing of a book with its imaginary characters leaping off the page is a great idea for a mosaic about imagination. The students made these characters out of clay, then glazed them and fired them. The characters literally jump out of the book and land on the surrounding walls.
This is a fun detail. The 4th grade artists drawing of a book with its imaginary characters leaping off the page is a great idea for a mosaic about imagination. The students made these characters out of clay, then glazed them and fired them. The characters literally jump out of the book and land on the surrounding walls.